Quick Facts
- Category: Software Tools
- Published: 2026-05-01 06:01:49
- Navigating the EV Transition: A Strategic Guide for Automakers to Avoid $70 Billion in Losses
- Hearts in Space: Why Human Organs Shrink but Lab-Grown Ones Thrive
- 10 Ways Knowledge Graphs Revolutionize AI Accuracy: From Stale Data to Graph RAG
- Manchester Code: The Self-Clocking Solution That Transformed Digital Communication
- Deceptive Call History Apps on Google Play Defraud Thousands of Users
Introduction
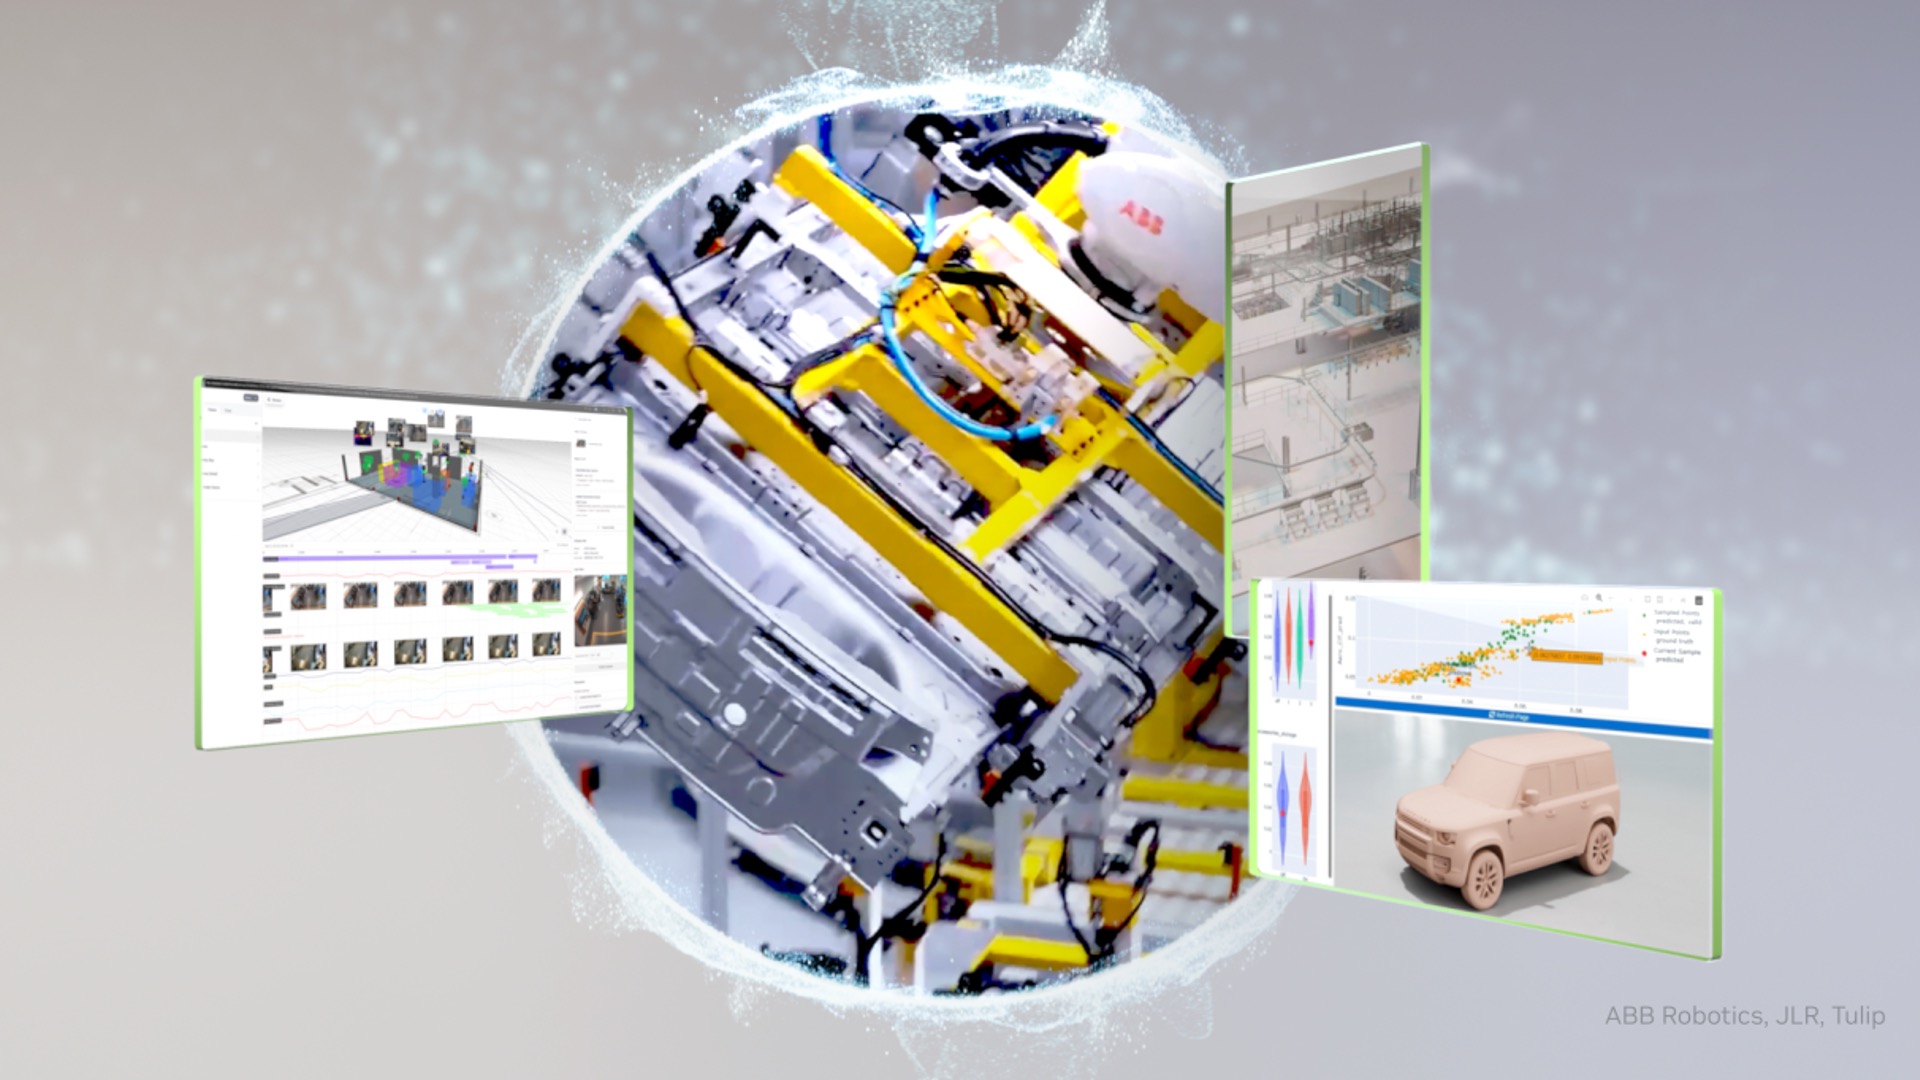
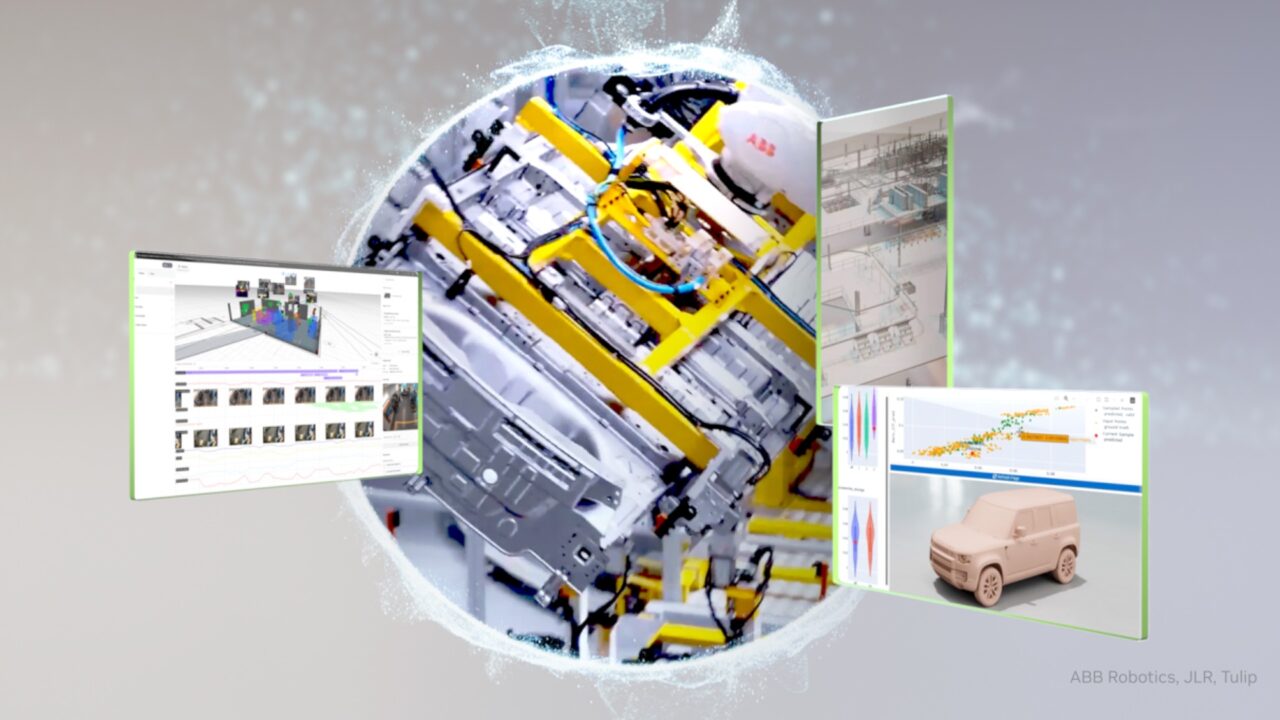
Manufacturing has long relied on a design-build-test cycle where real-world testing was considered the only reliable way to validate production systems. That assumption is rapidly becoming obsolete. Today, high-fidelity simulation can generate synthetic training data accurate enough for production-grade AI, enabling perception systems, reasoning models, and agentic workflows to excel in live factory environments. The key enabler? OpenUSD, a connective standard that makes simulation practical across diverse 3D pipelines. This guide walks you through the steps to transition your manufacturing workflow to a simulation-first approach, drawing on proven examples from industry leaders like ABB Robotics and JLR.
What You Need
- OpenUSD-compatible software (e.g., NVIDIA Omniverse, Blender with USD support, or other 3D tools that read/write USD files)
- Computer-Aided Design (CAD) tools (to create initial 3D models of parts, assemblies, and factory layouts)
- Simulation platform (such as NVIDIA Omniverse libraries or RobotStudio HyperReality for robotics)
- AI training infrastructure (GPUs, data management tools for synthetic data generation)
- Physical AI stack (perception systems, reasoning models, and agentic workflows to deploy after simulation validation)
- Team expertise in 3D modeling, simulation, and AI (or willingness to upskill)
Step-by-Step Guide
Step 1: Audit Your Current Design-Build-Test Cycle
Begin by mapping out your existing product development and factory commissioning processes. Identify where physical prototypes and real-world testing are causing bottlenecks, high costs, or long lead times. Common pain points include late-stage design changes, rework due to integration issues, and lengthy commissioning periods. This audit will help you pinpoint the areas where simulation can deliver the biggest impact.
Step 2: Standardize on OpenUSD for 3D Asset Exchange
One of the biggest challenges in manufacturing simulation is that assets lose physics properties, geometry, and metadata when moving between CAD, simulation, and AI training tools. To solve this, adopt OpenUSD as your universal 3D interchange format. OpenUSD preserves critical information across pipelines, ensuring that a robot arm designed in CAD behaves identically in simulation. Start by converting existing CAD files to USD and establishing a central asset library with version control.
Step 3: Implement SimReady Content Standards
SimReady is a content standard built on OpenUSD that defines what physically accurate 3D assets must contain. Use it to ensure your models carry correct geometry, material properties, physics parameters (mass, friction, joint limits), and metadata (sensor parameters, semantic labels). Without SimReady, simulation results may not match reality. Create templates and validation scripts to check that every asset meets SimReady requirements before entering the simulation pipeline.
Step 4: Build a Physics-Accurate Simulation Layer Using NVIDIA Omniverse
With your SimReady assets in place, set up a simulation environment using NVIDIA Omniverse libraries. This platform provides physics-accurate, photorealistic rendering and real-time interaction. For example, ABB Robotics integrated Omniverse into RobotStudio HyperReality to run the exact firmware code that will later run on physical robots. Your simulation should mirror the real factory down to lighting, tolerances, and sensor noise. This step is critical for training AI models that can transfer to physical hardware with minimal adjustment.
Step 5: Generate Synthetic Training Data at Scale
High-fidelity simulation enables you to generate vast amounts of synthetic data covering edge cases that would be impractical to capture manually. Vary lighting conditions, camera angles, object positions, and geometry tolerances. Use these variations to train perception models (e.g., object detection, pose estimation) and reinforcement learning agents. The more diverse your synthetic dataset, the more robust your AI will be. Track scenarios that are underrepresented and generate them deliberately.
Step 6: Validate Simulation Accuracy Against Real-World Metrics
Before deploying AI models trained in simulation, you must close the sim-to-real gap. ABB Robotics achieved 99% accuracy by vertically integrating the stack and optimizing rigorously. Set up a validation protocol: run identical test cases in simulation and on physical equipment, then compare key performance indicators (cycle time, success rate, part tolerances). Use metrics like correlation coefficient or mean absolute error. If accuracy falls below your threshold (e.g., 95%), refine your simulation parameters or asset properties. JLR, for instance, trained neural surrogate models on 20,000+ wind-tunnel-correlated CFD simulations to achieve reliable aerodynamic predictions that compressed four hours of simulation into one minute.
Step 7: Integrate Simulation into Your Product Development Lifecycle
Now that your simulation outputs are reliable, embed them into your standard operating procedures. Use simulation to validate designs before building physical prototypes, to test part tolerances in assembly, and to commission production lines virtually. This dramatically reduces product introduction cycles (ABB reports up to 50% reduction), commissioning time (up to 80% reduction), and total equipment lifecycle costs (30-40% reduction). Update your milestones to require virtual sign-offs before physical builds begin.
Tips for Success
- Start small, scale fast: Pick a single high-impact process (e.g., robotic cell commissioning) to prove the approach before rolling out across the factory.
- Invest in data management: Synthetic data generation creates massive datasets. Use a robust data pipeline with versioning and labeling to avoid confusion.
- Collaborate across teams: Simulation requires input from design, manufacturing, AI, and IT. Form cross-functional teams to align goals.
- Measure and iterate: Continuously track sim-to-real accuracy as you add new assets or change processes. Recalibrate as needed.
- Embrace open standards: OpenUSD is still evolving. Stay updated with the latest features to maximize interoperability.
- Leverage existing platforms: If you use RobotStudio, Siemens NX, or other tools, check for OpenUSD plugins or integration with NVIDIA Omniverse to simplify adoption.
By following these steps, you can move from a testing-heavy physical-first model to an efficient simulation-first operation that accelerates innovation, reduces costs, and improves quality. The examples of ABB Robotics and JLR show that the path is proven—now it's your turn to build the factory of the future.